Connect From PyODBC to SQL Server in DataBricks Cluster
It’s a shame that clusters created in Azure DataBricks don’t have
the pyodbc drivers for Microsoft SQL Server installed by default.
Perhaps the people who normally use DataBricks don’t typically connect to
SQL Server, but it feels that it’d be easier if the images provided
by Microsoft would enable that by default.
Then, to make things more difficult, a lot of the answers on the Internet
on how to install these drivers are for the older versions of DataBricks.
The newer versions change slighly the approach used to install them.
The gist of the install process is as following:
- Create an install shell-script to install the
msodbcsql17package - Save it as a file in DataBricks, whether as a Workspace script or in a connected repository.
- When configuring the cluster, add this file as an “init script”.
Install Script
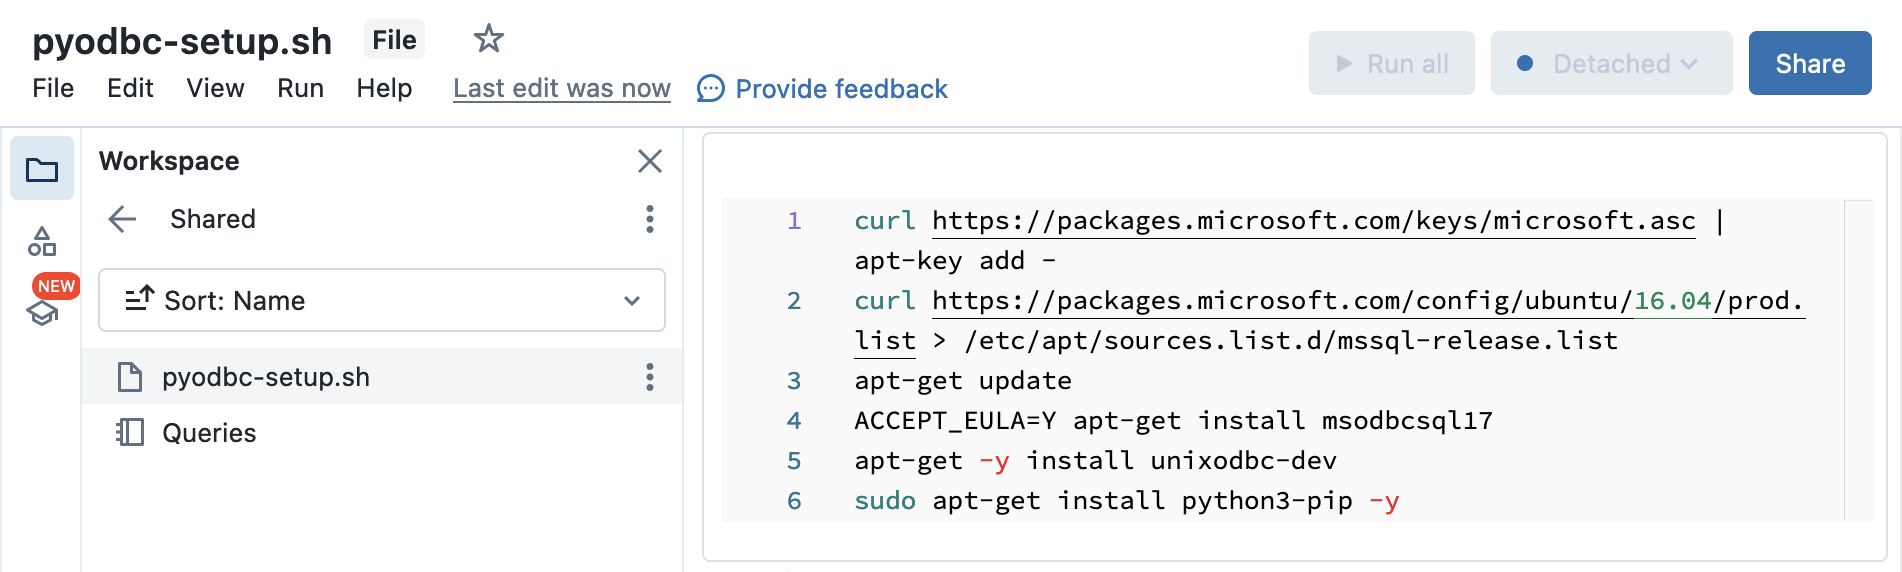
The script below is centered around installing the msodbcsql17 driver.
For this, we need to import the Ubuntu sources for apt and then install
the package along with the unixodbc-dev:
curl https://packages.microsoft.com/keys/microsoft.asc | apt-key add -
curl https://packages.microsoft.com/config/ubuntu/16.04/prod.list > /etc/apt/sources.list.d/mssql-release.list
apt-get update
ACCEPT_EULA=Y apt-get install msodbcsql17
apt-get -y install unixodbc-dev
sudo apt-get install python3-pip -y
Saving Script in DataBricks
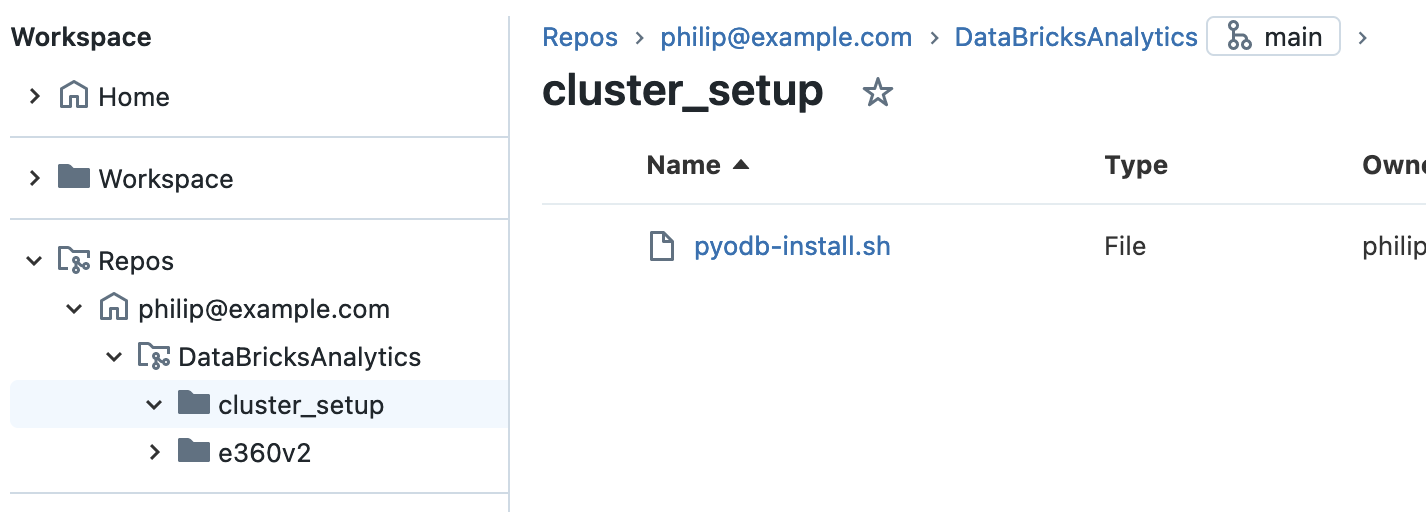
Save the script as a file, say pyodb-setup.sh, in either a DataBricks repository:
or directly in a Workspace file (in the example below, stored in
Workspace/Shared/pyodbc-setup.sh):
Configure DataBricks Cluster
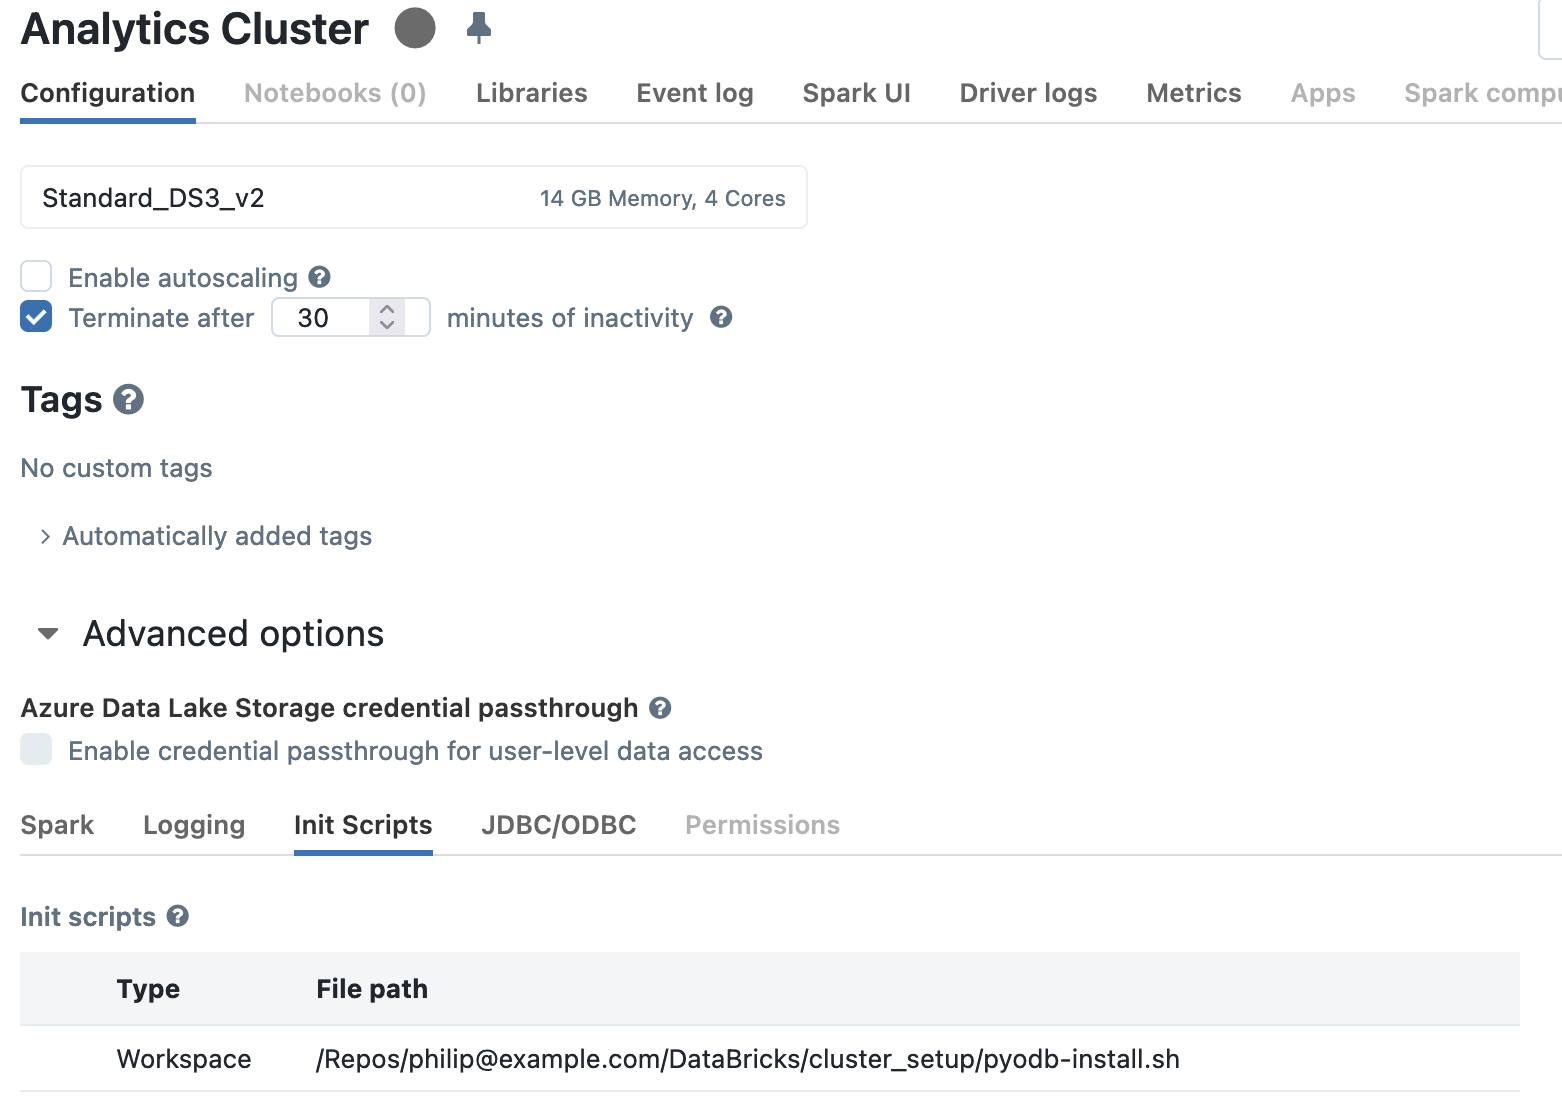
Either during creation, or after, configure the DataBricks cluster by expanding
the “Advanced Options” section on the “Configuration” tab, then by selecting
the “Init Scripts” tab.
There will be three options to add a new script:
“Workspace”, “ABFSS”, and “DBFS”.
The “DBFS” is deprecated, and the “ABFSS” (Azure Blob File System or Azure Data Lake Storage Gen) is a bit more complicated to set up; the “Workspace” approach outlined above is the simplest.
The path to the pyodbc-setup.sh script is relative to the root of “Workspace”,
so /Shared/pyodb-init.sh or
/Repos/user/repo/pyodb-install.sh if in the repository.
Connecting
This whole setup allows pyodbc to connect to a SQL Server using a connection
string specifying the SQL Server 17 driver,
"DRIVER=ODBC Driver 17 for SQL Server;...",
like so:
server = "example-server.database.windows.net"
db_name = "example-db"
user = "example_user"
pwd = "example password"
conn_string = f"DRIVER=;SERVER={server};DATABASE={db_name};UID={user};PWD={pwd}"
conn = pyodbc.connect(conn_string)
with conn:
  conn.execute("select * from table")
As a note, there’s a newer version, msodbcsql18 – see
here the whole list.
The script remains the same, save for pointing to a different Ubuntu,
for example: https://packages.microsoft.com/config/ubuntu/18.04/prod.list.